
I recently finished designing and implementing a tramp floor for my 16′ Maravia Cat. And first and foremost I’ll say this floor was inspired by a friend’s floor that I had the pleasure of hanging out on last summer. The conundrum I found myself in when I embarked on this endeavor, is that I, like my friend, wanted a tramp floor I could stand on, which is contrary to common wisdom regarding what a tramp floor “should” be. I’m writing this post partially because it was fun and I’m proud of my work, and partially because when I went looking for standing tramp floor advice, it was woefully unavailable in the online rafting community as best as I could tell. So hopefully some like minded rafter will find this one day and appreciate it.
On the surface this might seem like a simple problem, tie the floor to the frame, make sure it’s tight. Turns out, it’s not that simple. I initially tried exactly this, ran some pieces of rope through the grommets in the floor and wrapped said rope around the frame. This solution yielded unacceptable results, the floor sagged ALOT. This first attempt left me at a loss for what to do, so I reached out to my friend, and he got me back on track. The new plan was a bit more involved but was sure to produce a tight floor.
The recipe is as follows:
- 2 — 20′ 1/2inch diameter ropes
- 18 — 1′-1″ cam straps (varies with floor length)
- 4 — speed rail spreader bar mounts
- 2 — 41″ spreader bar (varies with frame width)

More or less the materials listed above.
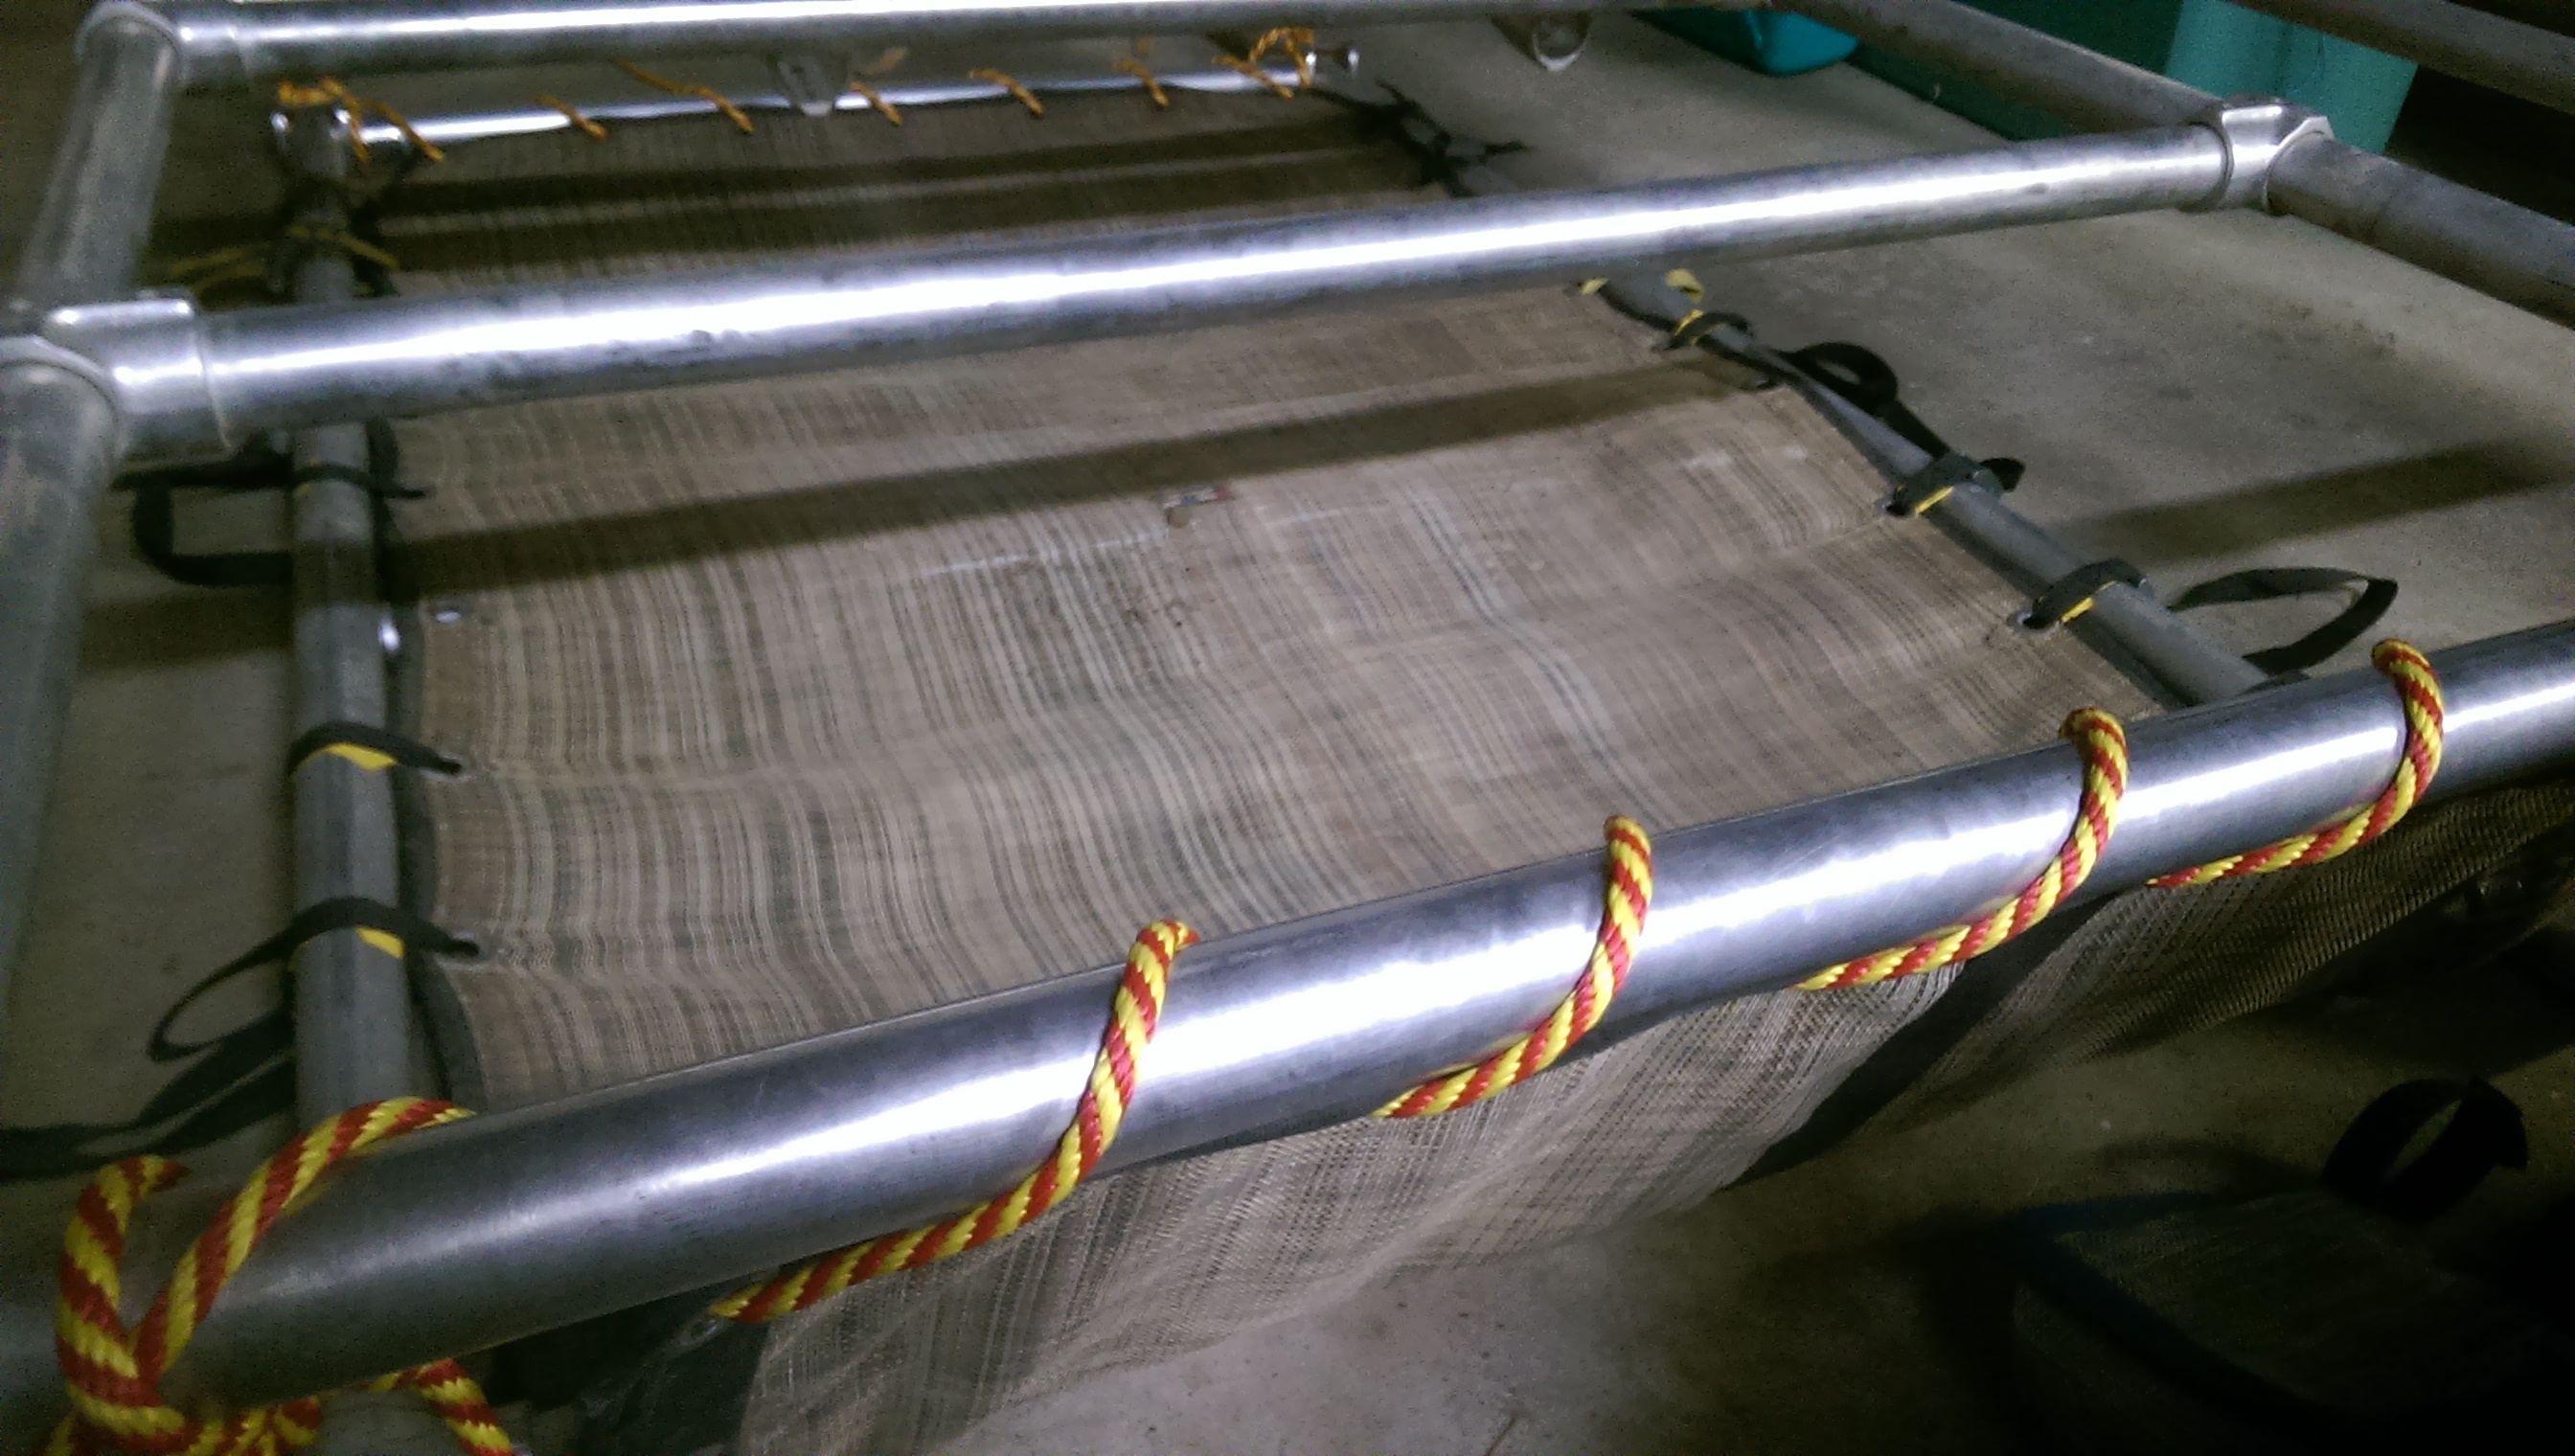
Tie the rope around the front and rear cross bar that you are attaching the floor to, running the rope through all of the grommets in the tramp floor. Pull it as tight as possible and tie it off. If you have adjustable spreader bars, on your frame, pull one in an inch or so from where you will eventually place it, and once you have the floor secured on front and back, you can push the spreader bar back into position, pulling the floor as tight as possible in the process. Install the new spreader bars underneath the floor, one third of the way down the length of the floor, and two thirds of the way down the length of the floor respectively. Attach 1′-1″ cam straps to each grommet on the sides of the floor, pulling them as tight as possible against the frame. That’s it. Hop on your new floor and see what you think.
finished product.
This design really hits everything I was looking for; standable, economical, and I even got a splash guard out of it. The straps really make the biggest impact on tightness, though straps all the way around is a bit pricey if you don’t just have a shitload of one footers lying around. The rope makes those 14 or so grommets on the front and back way cheaper, and having the spreader bars really becomes absolutely vital for a floor you can stand on that’s this large. And if your frame is similar to mine, you can add a splash guard and buy yourself even more stability with the leverage of the ~90 degree turn.